John’s WFPB Chocolate Cake

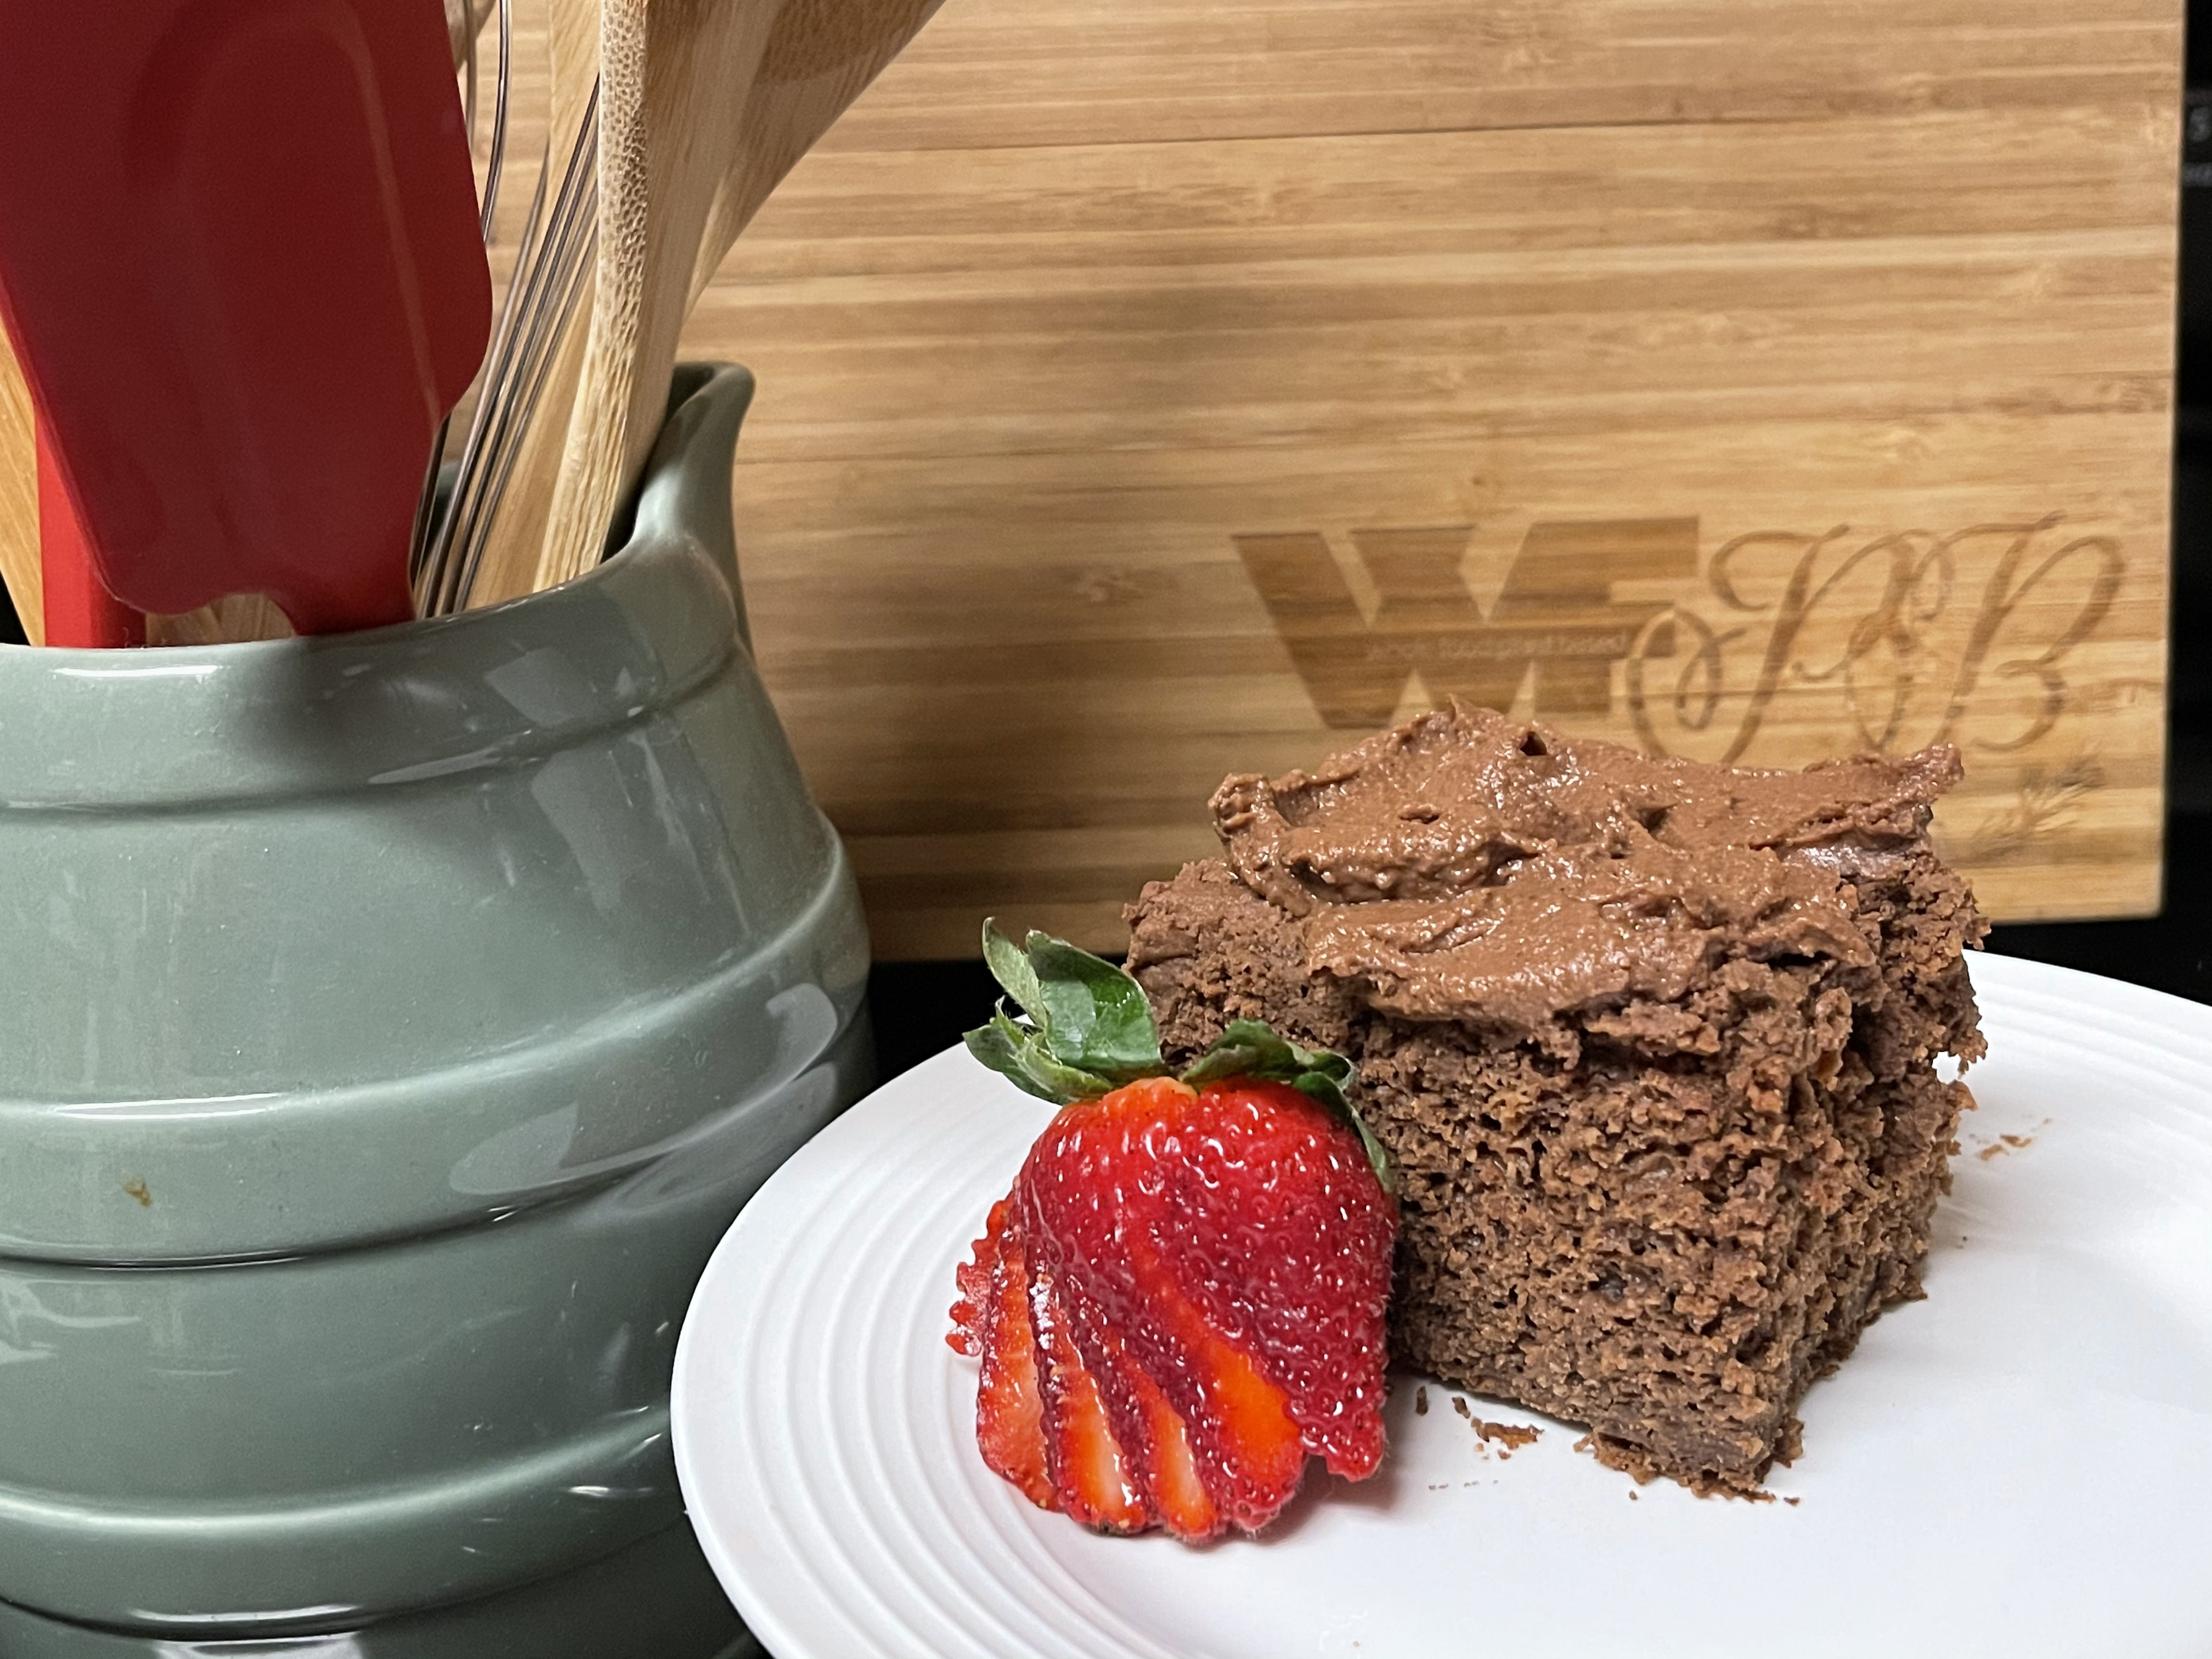
Okay who doesn’t like a really good piece of chocolate cake? I think I have nailed all I like about a good cake. This is a rich and and moist cake with a creamy frosting.

One of the secrets to get a good rise is to provide adequate amount of an acid to interact with the baking soda. In this case I went with a bit of a chocolate balsamic vinegar as the acid. The texture and the crumb of the cake came out perfect.

John’s WFPB Chocolate Cake

The recipe:

Batter

1/3 Cup Oat Groats
1/3 Cup Buckwheat
1/3 Cup Lentils, I use red lentils
2 Cups Filtered Water
6-7 Pitted Dates
3 Tbsp Cacao Powder, I use a cacao and reishi mushroom blend for bonus nutrition
1 Tbsp White Miso
1 Tbsp Chocolate Balsamic Vingar
1 tsp Vanilla Powder
1 tsp Baking Soda

Icing

1 can/box Garbanzo Beans
12-13 Pitted Dates
3 Tbsp Cacoa Powder
1/2 tsp Vanilla Powder
Strong Coffee, I use a Lungo (110 ml) of Dark Roast.

To make batter:

in a high-speed blender add the grains, lentils, and water and let soak for 3 hours. After soaking add the dates and miso then blend until smooth. Pour into a mixing bowl and add the remaining ingredients. Mix until all ingredients are incorporated then pour into a small glass baking pan. I have found there is no need to grease the pan. Bake at 375 degrees for 40 mins. For my setup using a large toaster oven, I cover the top with foil for the first 30 mins to prevent over browning. Cool to ice the cake later.

To make the Icing:

Add all ingredients to food processor or blender and process until smooth. Top the cake with as much as you want and store the rest as a different treat for later. If the icing is not as smooth as you prefer you can add a bit of water and blend until it reaches the smoothness you desire.

John’s WFPB ‘Tis the Season Nog

As a kid I thought there was nothing worse then egg nog. Thankfully as an adult I helped a friend cater holiday party where we did homemade egg nog, I got hooked. There is something wonderful in the blend of creaminess and seasonings. I had tried some store bought plant-based nogs and found them very lacking in flavor and in texture. I fortunately purchased a NutraMilk system a while back and decided to create my own recipe. While I have the nice plant-based milk system you can some extra effort do this recipe with a nut bag. Truth be known I pull last bits liquid using the bag.

Rich creamy nut based nog

The blend

1 1/2 Cups Soaked Cashews 
1 1/2 Cups Almonds
48 oz filtered water
7 Pitted Medjool Dates
7 Cardamom pods
1 Tbsp Ground Cinnamon 
1/2 tsp Fresh Ground Nutmeg
1/2 tsp Ground Cloves
1/4 tsp Ground Ginger
1/8 tsp Ground All Spice

I start this by soaking the cashews for at least 30 mins, this is not necessary with a high-speed blender or food processor, it is just a habit I have. Since I have the NutraMilk, I add all the ingredients except for the water to the system and process them into a nut butter, usually I process for nine minutes. I then add the water and mix the ingredients for three minutes to liquify as best as possible. I drain to my container and then transfer the pulp that is left over to a nut bag to squeeze out remaining liquid. For thinner nut milks the system is very efficient to drain all liquid, but this is a very thick cream like and needs the extra help.

If you do not have nut milk system just add all ingredients in blend/processor and blend until smooth then use the nut milk bag to separate the liquid from the pulp.

Chill and enjoy straight or with a hit of your favorite bourbon or rum.

John’s WFPB Pumpkin Pie

With Thanksgiving tomorrow I started to think about key part the dinner the pumpkin pie. Ever since I was a kid, mom’s pumpkin pie was always my favorite thing about the dinner. As an adult I continued the tradition of making pumpkin pies each fall, and even sometimes in the off seasons when my sweetheart had requested. My concern was how to get all of the flavors creaminess while keeping it Whole Food Plant Based. I also decided to add additional flavor by making it grain free. This is a very sweet rich dessert and it does not take much to make me happy.

John’s WFPB Pumpkin Pie

For the Crust

1 ½ Cup Dried Figs, stems removed
1 Cup Walnut Pieces
½ Cup Cashews

For the Filling

2 Cans Pumpkin Puree
2 Cups Plant Milk
1 ½ Cups Pitted Dates
2 tsp Ground Cinnamon
1 rsp Vanilla Extract
½ tsp Fresh Grated Nutmeg
½ tsp Ground Cloves
½ tsp Ground Ginger
¼ tsp Ground Allspice

Preheat oven to 350, once the oven beeps for temp I let it rest for 10 minutes more to stabilize temperature.

In the food processor blend dates and nuts. Press in to pan and bake for 10 mins.

In blender add filling ingredients. Blend until smooth and silky.

Pour into slightly cooled pie pan and bake for 35 to 45 mins.

Cool and enjoy.

With this recipe I ended up with a bit of baker’s treat.

Perfect amount left over to use for other recipes or just to enjoy as a special dessert.

John’s WFPB Sunday Pancakes.

One of my fondest memories of my father was coming home from Sunday school to the aroma of his sourdough pancakes. I have always enjoyed pancakes of any fashion. My goal with this recipe is to make a simple but highly nutritious version.

Pancakes with Blueberry and Cauliflower Topping

Ingredients

For Pancakes
1/4 cup Red Lentils
1/2 cup Rolled Oats
3/4 cup Filtered Water
1/8 tsp Fresh Grated Nutmeg
1/4 tsp Baking Soda (Optional)

On Saturday night prep the lentils by soaking them 1/2 cup of water. I do this right in my bullet blender. In the morning add the remaining ingredients and blend until smooth. I transfer to a 2 cup liquid measuring container from easier pouring. Preheat a non-stick pan to medium heat. The pan is ready when water droplets dance in the pan. Pour in some of the mixture and cook until you see the pancake looks dry around the edges. Flip to finish cooking. Repeat for remaining mixture. This recipe makes five nice size pancakes. Stack finished pancakes and server with fruit topping.

Fruit Topping
3/4 cup Fresh Blueberries
2 cups Frozen Riced Cauliflower
1/2 tsp Cinnamon
1/8 tsp Fresh Grated Nutmeg

In heated pan add ingredients and put on lid to steam heat the mixture. After a few moments remove lid and continue to heat. As the berries strait to release their juices stir to blend and color the cauliflower. When done use to top the pancakes and enjoy.

John’s WFPB K’So?

So I have been working on this recipe to improve the texture and make it more usable for different recipes. To add a richer texture I decided on the reduction of the tapioca flour and the addition of white beans. Not only does the sauce come out thicker from the blender but I now have added a source of good prebiotic fiber. I have started a seven week gut health course led by the author of Fiber Feuled, Dr. Will Bulsiewicz, so I am trying to incorporate ideas from his book to my daily life.

Ancient Harvest elbow mac with queso served with John’s WFPB ‘The Burger’

Recipe

1 Large Head of Cauliflower
2 Can/Box of White Beans (Garbanzo is my choice)
½ cup Roasted Red Bell Pepper
4-5 Lower Sodium Chipotle Peppers with some of the Adobo Sauce
½ cup Nutritional Yeast Flakes
2 tbsp Tapioca Flour
2 tbsp Granulated Garlic
1 tbsp Granulated Onion
1 tbsp White Miso
2 tsp Lactic Acid
(1 tsp Red Pepper Flakes, still an option, but I am leaving out to have a base sauce.)
1 tsp Cumin
1 tsp Ground Mustard
½ tsp Black Pepper
½ tsp Ground Turmeric
¼ tsp Nutmeg
2 cups Low Sodium Veggie Stock
1 tbsp Worcestershire Sauce – Vegan
1 to 2 tsp Liquid Smoke I have move to 1 1/2 and like the results

Directions

Trim the green parts off of the cauliflower and then pressure cook the head for 2 minutes with a 10 minute natural release period.

Combine all ingredients in 64 ounce high speed blender container. Blend at maximum speed until smooth. When the sound changes the sauce is thickened and is ready to transfer to storage containers.

Serve with home air fried corn tortillas and a good low sodium salsa. Alternately add some additional Nutritional Yeast Flakes and use for a great ‘cheesy’ sauce for macaroni and cheese.

John’s WFPB White Bean Chicken-less Chili

I am thrilled to announce that I have my first three home-grown Jalapeños. It is time to make one of my all time favorites in the WFPB style. One of my secrets for this recipe is to use a no chicken broth that helps to impart the chicken-type flavors that I am looking to have in this chili. My love of chili started with traditional white bean chicken chili. This was long before I decided that I enjoyed the traditional chili (still ones with beans). My goal is to remove the meat meant leaving extra room for more white beans. I also remove excess sodium level by punching up the flavor with lots of fresh squeezed lime juice.

John’s WFPB White Bean Chicken-less Chili

Ingredients

2 boxes of Cannelini No Salt Added beans – drained and rinsed
1/2 Lg Onion – Diced
2 stalks of Organic Celery – Diced
1 Carrot – Diced
Jalapeños to taste – Cleaned and Diced
3 tbls Granulated Garlic
2 tbls Ground Cumin
2 tsp Ground Coriander
2 tsp Dried Oregano
1 tsp Ground Black Pepper
2 cups No Chicken / No Salt Added stock
6 tbls Fresh Squeezed Lime Juice

Dice the onion, celery and carrots then sauté using water as needed to prevent sticking. Once the vegetables are softened add garlic, cumin and coriander to bloom the flavors and then add remain ingredients. Bring to a simmer and let simmer for at least 30 mins.

Serve with tortilla strips that have been air fried and a wedge or two of lime.

I am looking forward to bounty that is my apartment balcony garden with tomatoes three ways, the jalapeños, small red bell peppers and a few fresh herbs.

John’s WFPB Queso

Since childhood I have always loved and even craved Queso and Chips. When I learned to make the traditional smooth cheese product and tomato / pepper combo, I was in heaven. I have found several variations of vegan cheeze sauces and really wanted something even healthier. Since I am a follower of Dr. Greger and his strong recommendation for finding a way to add in a cruciferous vegetable where ever possible, I came up with this idea. This recipe is similar to my WFPB Béchamel Sauce.

John’s WFPB Queso

Recipe

1 Head of Cauliflower
1 cup Tapioca Flour
½ cup Roasted Red Bell Pepper
½ cup Nutritional Yeast Flakes
2 tbsp Granulated Garlic
1 tbsp Granulated Onion
1 tbsp White Miso
2 tsp Lactic Acid
1 tsp Red Pepper Flakes
1 tsp Cumin
½ tsp Black Pepper
½ tsp Ground Mustard
½ tsp Ground Turmeric
¼ tsp Nutmeg

3 cups Low Sodium Veggie Stock
1 tbsp Worcestershire Sauce – Vegan
1 tsp Liquid Smoke

2 tbsp of Low Sodium Salsa for each serving to complete the feel of the traditional sauce

Directions

Trim the green parts off of the cauliflower and then pressure cook the head for 3 minutes with a 10 minute natural release period.

Combine all ingredients in 64 ounce high speed blender container. Blend at maximum speed for 5 to 7 minutes. When the sound changes the sauce is thickened and is ready to transfer to storage containers.

Serve with home air fried corn tortillas.

John’s WFPB Jambalaya

So yesterday I was pondering what to make for dinner. While visiting my neighborhood store I came across a jar of cajun seasoning and I thought to myself “self you have not made any New Orleans-style food in a long time.” I started formulating my Whole Food Plant Based version of a jambalaya. This is not the easiest to make Whole Food Plant Based, because of heavy use of meats in the dish. I could have easily used a variety of the plant “meats”, but they are not WFPB compliant. I chose instead to focus on lots of fresh vegetables and in keeping with the current program that I am on, Engine 2’s 10X, I made sure that I had plenty of greens included. If I were not on the 10X program, I would have included some Soy Curls to give it a poultry-like texture.

John’s WFPB Jambalaya

Recipe

1 medium Red Onion
3 stalks of Celery
1 Red Bell Pepper
1/3 Orange Bell Pepper
1/3 Yellow Bell Pepper
1 Zucchini
1 Yellow Squash
Tips from 1 bunch of Asparagus (thick stalks)
1 8 ounce package of frozen Cauliflower and Broccoli blend
1 cup frozen Sweet Corn
1 and 1/2 cup (170 gr) frozen Riced Cauliflower
1 can of No Salt Added Diced Tomatoes
1 cup sprouted Brown Rice
3 cups of Fat and Salt Free Vegetable Stock

Seasonings

2 tbsp Salt Free Cajun Seasoning
2 tbsp Granulated Garlic
1 tbsp Poultry Seasoning
1 tbsp Dried Oregano
1 tbsp Smoked Paprika
1 tbsp Black Pepper
1 tbsp Vegan Worcestershire Sauce
1 tsp Low Sodium Hot Sauce
3 Bay Leaves

Directions

I used my Instant Pot to prepare this meal. Start by cutting the Onion and Peppers into a large dice. Slice the Celery to be about the same size. Sauté in the Instant Pot with some water to prevent sticking. When Onions become translucent add in the seasonings and blend / sauté to fragrance the spices. Cut the Zucchini and Yellow Squash in to four long strips then into large dice. Add all the remaining ingredients in to the instant pot and pressure cook for 20 mins then a 10 minute natural release followed by quick release. Serve and enjoy.

Option Idea

One option you might try is using various mushrooms sautéed separately with some dried kelp seasoning added at the time of service to help give the effect of seafood. I did not have any mushrooms to try this.


John’s WFPB Ummm…My Sauce

This sauce started life as a test to produce a asian-style dipping sauce that was nut free. I was not sure what to expect and the first attempt was so delicious that I have not gone back to make any adjustments.

The recipe:

1 Can No Salt Added Chickpeas – Drained, Rinsed and Roasted
1 Tbs Braggs Liquid Aminos
1 Tbs White Miso
1 Tbs Apple Vinegar
1 Pitted Date
1/4 tsp Red Pepper Flakes
1/2 tsp Ground Ginger
1/2 Zested and Peeled Lime
Big Dollop of Minced Garlic, I use a prepared Minced Garlic in packed in water
2/3 C Low Salt Veg Stock
1 1/3 C Water

Place drained and rinsed chickpeas in your air fryer to roast. I used Instant’s Vortex Pro using both trays for 11 minutes. You may also roast them in a conventional oven at 375 until they are turning golden brown.

Chickpeas after 11 mins in the air fryer

Transfer 1 cup of the roasted chickpeas in to high speed blender, a bullet type cup blend works great. Add in rest of ingredients.

Serve and enjoy with fresh vegetables, spring rolls, really anywhere or way you want.

This sauce has become a go to sauce for me. I air fry my fresh cut French Fries and dip in to this sauce. It allows me to leave the fries unseasoned and still taste great.

Bonus recipe:

John’s WFPB White Beans and Kale Soup

This is really simple to make and it is totally up to you which beans you want to use. I used one 15.5 ounce can each of No Salt Added Cannellini, Great Northern, Butter beans and one 29 ounce of Navy beans. Simply add entire can of beans and juice to stock pot and heat. I added one cup of No Salt Added Vegetable Broth and blend of herbs to taste. The herbs included Italian Herbs, Oregano and a couple of Bay Leaves. Add Black Pepper to taste and if you need some salt character add in some White Miso at the end.

Once the bean soup is heated serve on top of chopped Kale. I fill the bowl with a big handful of Kale and then ladle the bean soup on top. Let the soup rest for a few moments to heat/cook the Kale. I freshly grate some Black Pepper on top and enjoy.

Hint: I purchase a large bag of pre-chopped Kale weekly to use throughout the week. it is a great time saver.

John’s WFPB Burger

Often I feel the need for a good burger. I discovered a good recipe to start as the foundation for my adaptation. I was watching a YouTube video from Sauce Stache who was remaking a recipe from a Canadian chef. The video can be located at his site http://www.saucestache.com.

For my version of the recipe I removed the oil and upped some of the other ingredients. One major adjustment I did was to use Methylcellulose HV which is a thickener and emulsifier. It is soluble in cold water and when heated it adds a nice structure to the burger giving it a bit of chew. Methylcellulose HV is derived from cellulose and is inert to the human body. I felt the original recipe while tasted good still lacked the texture I was looking for in a burger this proved to be a good solution.

Time for the recipe:

12 oz Portobello Mushrooms
1 Can No Salt Added Black Beans drained and rinsed
1 Can No Salt Added Chick Peas drained and rinsed
1 Can No Salt Added Lentils drained
2 Cup Rolled Oats
1 Luv Beets
1 tbsp Tapioca Starch
1 tbsp Nutritional Yeast
1 tsp Marmite
2 tbsp Liquid Smoke
4 g Methylcellulose HV

Lightly brush portobello mushrooms to clean them. Chop the mushrooms. Heat in a skillet over medium heat adding mushrooms once heated and cook them until they have expressed most of their liquids.

Drain and rinse both cans of beans and drain Lentils and add 1/2 to food processor bowl (reserve the rest for later). Add 1 cup of oats and all the sautéed mushrooms into blender with the beans. Pulse quickly to mix

Chop beet and to blender. Pulse to mix

Add tapioca starch, marmite, nutritional yeast, and liquid smoke to blender and pulse to mix

Pour mixture into bowl and add remaining lentils and oats. Mix to incorporate.

Divide the mixture in to 12 parts and place each in a plastic bag (you can also us layers of parchment paper) to chill and then flatten. Our goal is to make the burger pretty thin.

Cook on each side for 4 to 5 mins and the burger is ready to enjoy.

To serve I have found a whole grain lavash bread at one of those big box store that serves as my bun/wrap. I start out by using a layer of hummus because hummus is just better than mayonnaise. I use mixture of baby spinach and arugula to get my cruciferous vegetables. Top the greens with some fresh salsa and then my homemade white cheese from John’s WFPB Béchamel Sauce bonus recipe. I place the cooked burger on top and then wrap the burger with the lavash and then in dry skillet brown both the top and the bottom. I serve the burger with homemade fries and John’s WFPB Ummm…my Sauce that will be posted in the next few days.

I have been impressed on how well this recipe solves my need for burgers. It has enough texture to simulate actual cooked ground beef. I hope that you find this recipe helpful in developing your own WFPB lifestyle.